Product quality is vital to customer satisfaction, but performing quality inspections in high-volume or low-volume/high-mix manufacturing presents unique challenges that require precision solutions. Without the appropriate systems and tools for performing high-speed metrology and inspections, manufacturers sacrifice time and efficiency, while increasing the risk of producing defective products that can lead to expensive recalls or poor customer experiences.
To address critical issues with high-speed inspection, many manufacturers are turning to non-contact metrology systems. DWFritz designs and builds solutions using advanced non-contact technologies, including sensors, cameras, and material handling systems coupled with software innovations to overcome these challenges.
Before we jump to the solutions, though, first we must identify the key challenges in high-speed inspection. So what are some of the key challenges in high-speed inspection?
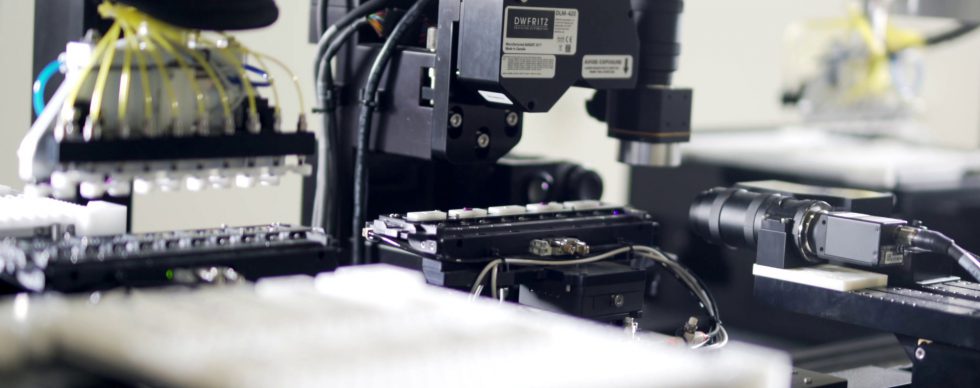
Automated, high-speed inspection and metrology solutions use precision material handling and mutiple non-contact sensors to achieve optimal throughput and produce high-quality results.
Speed vs Performance
Cycle times are critical, but maintaining performance at high speeds is a challenge. Lower takt times force manufacturers to consider sampling as a means of inspecting products or parts. Achieving 100% inspection often requires manufacturers to slow down production. Of course, speed without high-quality results would not be worth much. So how do systems achieve high-quality results?
Achieving 10% GR&R
A critical concept in measurement systems, Gage Repeatability & Reproducibility (GR&R) is extremely important in qualifying or validating a measurement device. GR&R is a statistical tool used to describe the inherent variation in a measurement system, which is often the primary contributor to process variation.
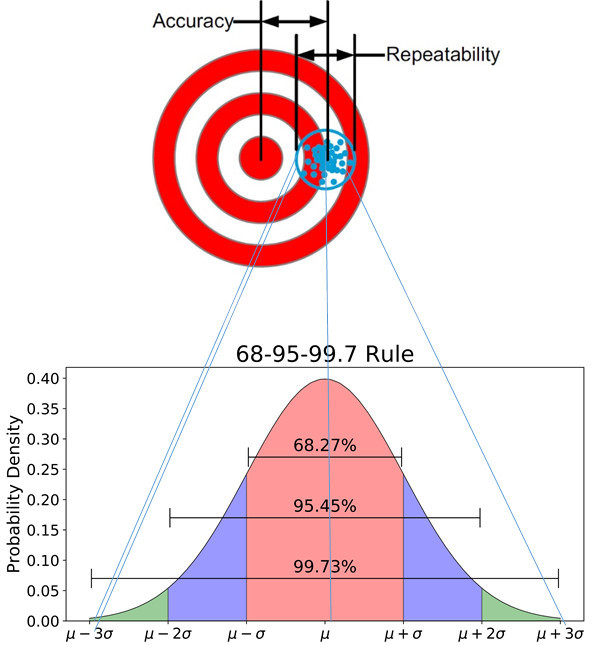
By describing the repeatability and reproducibility of a measurement, GR&R provides a measure of how much the output of a measurement system is driven by its variation (or noise). Ideally, GRR would be 0 and the output would precisely correspond to the part being measured. As the GRR rises, the output scatters further from the actual value of the item being measured. Imagine making a decision based on a GRR of 50%. Making that same decision based on a coin toss rather than the measurements themselves would be just as consistent.

Figure 1. Accuracy and Repeatability
One common method of GR&R calculation is called average and range. It is basically the average variation divided by the range of the measurement. The industry standard (AIAG) has evolved such that a good system, generally, is one where the noise is <1%, which corresponds to a GRR of <10%. If the noise is between 1% and 9%, then GRR will be between 10% and 30% – this system is questionable. A poor measurement system has noise >9%, with a corresponding to >30% GR&R.
Strong Correlation
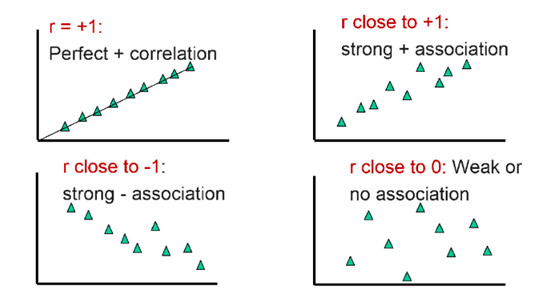
Correlation Coefficient (R-value) measures the association between two methods – a method-to-method comparison. We use R-value to determine when a new method of measurement sufficiently agrees with the old method enough to replace it.

Figure 2. Achieving Strong Correlation
R-values range from -1.0 to +1.0, where 1 represents perfect correlation, -1 is perfect negative correlation, and +1 perfect positive correction. An R-value of 1.0 is theoretically possible, as is correlation to a reference measurement system like a CMM, so ideally we want to get as close to 1.0 as possible.
Precision Material Handling
Most people do not think about fixture design and material handling as much as they should, but precision material handling plays a very important role in high-speed, non-contact inspection and repeatability.
Precision fixturing, or holding the part, requires several key characteristics:
1. Robust engineered design, particularly for high-value parts.
2. Ability to withstand fast, continuous motion to achieve required cycle times.
3. Firmly holding, without damaging the part.
Material handling, or articulating the part, must address some key characteristics:
1. Rapid movement of part, including high acceleration and deceleration.
2. The motion stage (or axis) must be highly engineered to prevent compromising repeatability.
3. Present part at right time and orientation to non-contact sensors.
Systems Integration
Analytics and integration with Manufacturing Execution Systems (MES) is a vital component in high-speed inspection, particularly as manufacturers move closer to Factory 4.0 environments. Integrating with MES enables upstream and downstream process steps to be continually optimized in order to ensure GD&T are within specs.
Solving Industry Challenges
Production facilities typically employ three types of inspection: In-line, Near-line, and Offline. In-line inspection is 100% inspection and is a perfect fit for high-speed, non-contact metrology. Near-line uses inspection systems near the line with results based on sample rates. Finally, offline inspection is associated with much lower sampling rates and typically done in a lab.
With production volumes up to >100 million parts per year in many instances, quality inspections in consumer electronics manufacturing can be a major challenge. The semiconductor industry also commonly uses 100% inspection for wafer production, in particular. High manufacturing volume alone, however, does not necessarily imply 100% inspection, but high value and high volume demands it.
Highly regulated industries, such as Aerospace (FAA) and Medical Devices (FDA), require 100% inspection due to human risks factors. Though lower in production volume, high value parts such as medical implants or airplane components require precision inspection and material handling. Automated inspection is very helpful in these use cases, as manual inspection is unreliable (to achieve 6-σ defect levels), increases risks, and is often more expensive in the long run.
In the next blog post, we will cover some use cases to help articulate how DWFritz overcomes many of these challenges.


