Speed, precision measurements and real-time data from non-contact metrology platforms make a difference in reducing scrap and improving yield for high volume consumer electronics manufacturers.

In contract manufacturing, 100% inspection is common, but measuring high volume consumer electronics parts for quality can be challenging. In smartphone manufacturing alone, the production volume can reach up to 100 million parts per year. These small units have tight tolerances for fitting a multitude of complex components, from system and memory chips to cameras and sensors to screws and fasteners.


Many smartphone contract manufacturers have turned to automated metrology for 100% inline inspection because these high throughput systems enable low cost inspection per part. These non-contact solutions provide manufacturers with real-time data to adjust upstream processes, plan predictive maintenance and reduce scrap, ultimately improving yield.
 
However, implementing a zero-defect process can be challenging. Quality assurance processes like Six Sigma are difficult to achieve when many consumer electronics products have a 1-year product life cycle. With the industry’s continual upgrading of features and functions in smartphones, tablets and other devices, these short product life cycles don’t give manufacturers much time to optimize quality processes. As a result, the best quality yield targets manufacturers can achieve are only 95% to 98%, which can lead to as much as 5% in scrapped parts.
 
To improve yield, some manufacturers may use selective assembly (or matched gauge assembly) to widen the range of part tolerances. In this process, components of a mating pair are measured and grouped into several bins during manufacturing. The final product is assembled by selecting the components of each pair from appropriate bins that meet the required specifications as closely as possible. For example, smartphone manufacturers may bin SD card drives and cell phone housing units with similar dimensions so that they can selectively assemble components that would otherwise be thrown away.
 
When binning parts for selective assembly, some manufacturers may use manual inspection, but this highly labor intensive process has low reliability and output because human inspectors use go/no go gauges to 100% inspect every dimension. This is where non-contact metrology solutions excel by capturing simultaneous multiple measurements up to 1,000X faster than human inspectors.

Measuring at the Speed of Manufacturing

Many automated metrology platforms use 3D and 2D non-contact metrology sensors to measure parts in motion, allowing inspection to often happen inline at the speed of manufacturing for greater yield. These non-contact systems can perform hundreds dimensional inspection points per second. In comparison, data capture on a traditional tactile coordinate measuring machine (CMM) can be slow, taking up to 10 minutes to capture 100 points. Non-contact 2D metrology systems can achieve the same gauge capability as CMMs for most geometries, as well as complex measurements that probes cannot reach.
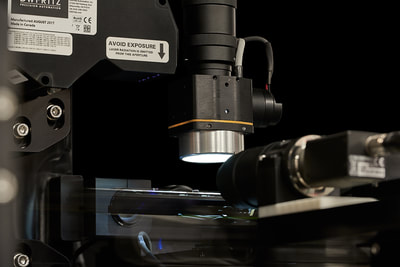
Non-contact laser systems like the DWFritz AMP 3100 can measure 3D profiles at high speed.


Non-contact metrology sensors measure parts in motion by using high speed machine vision, high scan rate 3D displacement sensors and other integrated multisensor solutions. The metrology zone uses application specific multispectral lighting and a strobe controller, ensuring parts are accurately scanned at the micron-level.
 
Material handling is a key component of high volume automated metrology platforms for increasing yield. These systems offer configurable metrology modules, starting with part input using trays, conveyors and process modules customized for specific parts. Part fixturing, including custom nests, provide precise placement for even the smallest parts, increasing gauge capability without marring the part surface.
 
Automated platforms use precision stages to move parts through a group of metrology sensors to capture multiple simultaneous measurements. Then the robot may transfer, reorient and re-fixture parts to the next metrology module, or move parts to the output station.
 
Upon output, parts are sorted based on inspection results such as pass/fail, binning requirements and statistical process control (SPC) data. Manufacturers can then analyze real-time inspection data to perform effective root cause analysis to improve upstream and downstream processes. SPC data can also drive warnings to reduce scrap and variability, and improve yield.
Detecting quality issues earlier in the consumer electronics product life cycle helps manufacturers identify and correct production issues in real-time. Non-contact inline inspection reduces cycle time and improves yield, ultimately reducing production costs and costly recalls.
Learn more about the ZeroTouch® family of high-speed, non-contact metrology systems.